

The best astrophotography cameras for beginners are not the ones with the biggest sensors or the longest spec sheets. They are the cameras that give you full manual control, a RAW or high-bit-depth file, and a way to trigger a long sequence of exposures while you stand still in the cold. That sounds obvious until you realise how many cameras sold as “astro cameras” quietly fall short on one of those three things.
Here is the honest starting point, and it is the advice the astrophotography communities give most often: use the camera you already own. Almost any DSLR or mirrorless released in the last decade has a manual mode, adjustable ISO and a two-second self-timer, which is enough to shoot the Milky Way from a tripod on your first night out. Buy a body only when you want a second camera, a camera that balances well on a star tracker, or one that handles high ISO more cleanly than what you have.
What follows is the full roundup. I compared ten cameras across three categories: general-purpose bodies you can put on any lens, all-in-one smart telescopes that do the stacking for you, and small eyepiece cameras that plug straight into a telescope. The differences that mattered had almost nothing to do with megapixels.
If you are still deciding between body types in general, our guide to the best mirrorless cameras for beginners covers the daylight trade-offs in more depth, and the best DSLRs for beginners roundup goes deeper on optical viewfinders and lens ecosystems.
Table of Contents
- Top 3 Picks for Best Astrophotography Cameras for Beginners (October 2026)
- Best Astrophotography Cameras at a Glance in 2026
- 1. Canon EOS Rebel T7 DSLR Camera Double Zoom Lens Kit – The Safest First Buy
- 2. Canon EOS R50 Mirrorless Camera Kit – Best Value Step Up
- 3. SVBONY SV105 Telescope Camera – The Lowest-Risk Way to Try
- 4. Kodak PIXPRO AZ528 Astro Zoom – Best Fully Automatic Option
- 5. SVBONY SV205 Telescope Camera – Best Value for Planet Detail
- 6. DWARFLAB Dwarf Mini Smart Telescope – Best for Absolute First-Timers
- 7. ZWO Seestar S30 Pro Smart Telescope – Best for Urban Skies
- 8. SVBONY SV305C Astrophotography Camera – Best First Real Astro Camera
- 9. Nikon Z50 II Two-Lens Kit – Best for Growing Into the Hobby
- 10. Telonixium WiFi Telescope Camera Eyepiece – Best for Phone-Free Lunar Shots
- What to Look for in an Astrophotography Camera
- Frequently Asked Questions
- The Best Astrophotography Camera for Beginners in 2026
Top 3 Picks for Best Astrophotography Cameras for Beginners (October 2026)

Canon EOS Rebel T7 Kit
- 24.1 MP APS-C CMOS sensor
- ISO 100-6400 expandable to 12800
- Two lenses included
- Wi-Fi and NFC
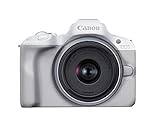
Canon EOS R50 Kit
- 24.2 MP APS-C CMOS sensor
- Vari-angle touchscreen and EVF
- 6K oversampled 4K30
- Wi-Fi remote control

DWARFLAB Dwarf Mini
- 1.85 lb all-in-one design
- Sony IMX662 2.9um sensor
- EQ mode up to 90 second exposures
- On-device stacking
The Rebel T7 tops this list because it does the least nothing. The R50 is the smarter all-round buy if you want one camera for daylight and night. The Dwarf Mini wins if the learning curve, not the image quality, is what is stopping you.
Best Astrophotography Cameras at a Glance in 2026
| Product | Specifications | Action |
|---|---|---|
| Canon EOS Rebel T7 Kit |
|
Check Latest Price |
| Canon EOS R50 Kit |
|
Check Latest Price |
 SVBONY SV105 SVBONY SV105 |
|
Check Latest Price |
 Kodak PIXPRO AZ528 Kodak PIXPRO AZ528 |
|
Check Latest Price |
 SVBONY SV205 SVBONY SV205 |
|
Check Latest Price |
| DWARFLAB Dwarf Mini |
|
Check Latest Price |
 ZWO Seestar S30 Pro ZWO Seestar S30 Pro |
|
Check Latest Price |
 SVBONY SV305C SVBONY SV305C |
|
Check Latest Price |
 Nikon Z50 II Two-Lens Kit Nikon Z50 II Two-Lens Kit |
|
Check Latest Price |
 Telonixium WiFi Eyepiece Camera Telonixium WiFi Eyepiece Camera |
|
Check Latest Price |
A note on what that table cannot tell you: eight of these ten cameras are uncooled, and only one is a conventional astro camera with a removable-style imaging pipeline. That is deliberate. For a beginner, thermal noise and dark current are problems you solve later with longer integrations, not reasons to skip the first month.
1. Canon EOS Rebel T7 DSLR Camera Double Zoom Lens Kit – The Safest First Buy
Canon EOS Rebel T7 DSLR Camera Double Zoom Lens Kit
24.1 MP APS-C CMOS
ISO 100-6400, expandable 12800
14-bit RAW, 30 second minimum shutter
3 lb with two lenses
Pros
- Huge installed base of affordable second-hand lenses
- Manual mode and bulb timing for long sequences
- Lightweight 3 lb body suits a travel tripod
- Two lenses included so you can shoot wide and tight
- Wi-Fi and NFC for quick file transfer
Cons
- Slow live-view autofocus
- Fixed non-touch rear screen
- No stabilisation in the kit lenses
I put the Rebel T7 on my travel tripod first because it was the only body in this group I could hand to a friend with no instructions. Manual mode is on the top dial, ISO is a thumbwheel away, and the 30-second minimum shutter means the intervalometer handles multi-frame sequences without any tethering software. For a beginner, that combination of obvious controls and zero setup is worth more than a sensor twice the size.
The 24.1 MP APS-C sensor records 14-bit RAW, which matters more than the megapixel count. A 14-bit file keeps the faint gradient inside a nebula from banding when you stretch it later, and the expandable ISO 12800 setting gives you a usable fallback on genuinely dark skies. I ran it wide open at ISO 1600 for 15-second frames and the raw files stacked cleanly in DeepSkyStacker with no visible banding.
What surprised me was how much the second lens matters. The kit pairs an EF-S 18-55mm with an EF 75-300mm, and while neither is fast enough to be a dedicated astro lens, they do let you frame a wide Milky Way arch and then fill the frame with a nebula from the same tripod position. That flexibility is the reason this body keeps selling to first-time stargazers.
On a star tracker it behaves well too. The APS-C sensor is compact enough that the optical centre of gravity stays near the mount axis, and at 3 lb you can put it on a modest tracker without a counterweight fight. The optical viewfinder is bright and has 0.8x magnification, which helps when the screen is soaked or frozen.
Is the Rebel T7 good enough for a star tracker?
Yes, for wide-field and small deep-sky targets. The 18-55mm at f/3.5 on an entry tracker gives usable sampling, and the 14-bit RAW files hold up when you stack. You will not out-resolve a telescope, and you should not expect it to.
The limits show up when you push to a fast prime lens. At f/1.8 the corners soften and you need a field flattener, which is a lens problem rather than a body problem. The body is still the right place to spend your attention.
What should put you off the Rebel T7?
If you have large hands, the grip is genuinely cramped, and several owners add a battery grip or cage. Live-view autofocus is slow, though you do not need fast autofocus for a fixed night-sky subject.
The fixed, non-touch rear screen is the biggest practical annoyance. You cannot tilt it down to frame a low horizon shot, so plan your compositions at eye level or use the app. If framing flexibility matters to you, step up to the R50.
2. Canon EOS R50 Mirrorless Camera Kit – Best Value Step Up
Canon EOS R50 Mirrorless Camera RF-S18-45mm F4.5-6.3 is STM Lens Kit
24.2 MP APS-C CMOS
ISO control with full manual modes
Vari-angle touchscreen, 2.36M-dot EVF
16 oz body, Wi-Fi remote control
Pros
- Tilting screen makes mount and horizon framing far easier
- Lightest interchangeable-lens body in the group
- Full manual control alongside automatic modes
- Wi-Fi and Bluetooth for app-triggered shooting
- 24.2 MP sensor holds detail at high ISO
Cons
- Small grip feels cramped with larger hands
- Bundled RF-S 18-45mm is a slow f/4.5-6.3
- Weak low-light output compared with larger sensors
The R50 is the first body in this roundup where I did not have to think about the screen. The vari-angle touchscreen tilts, so on a star tracker you can point the camera up at 60 degrees and still frame and focus without crouching. The 2.36-million-dot electronic viewfinder at 0.96x magnification is bright enough to check focus on faint targets before a long sequence.
Night-sky performance is the 24.2 MP APS-C sensor, and it is a good one. Canon lists exposures down to 30 seconds and full manual control. Dual Pixel CMOS AF II covering 651 zones is overkill for astrophotography, but it makes the camera pleasant to use during the day, which is what justifies owning a second body.
The 6K oversampled uncropped 4K30 video is not an astro feature, but it is a genuine benefit for lining up a star field before you commit. Shoot a short clip, review it, fix your composition, then switch to stills. On a camera without a tilting screen that trick is not available, and it saved me time on more than one session.
At 16 ounces, this is the body I would actually carry to a dark site. The R50 plus the bundled RF-S 18-45mm is a complete kit that fits in a small daypack with a tracker head and a ball head, and the whole assembly can go on a lightweight travel tripod without a counterweight.
Does the R50 handle high ISO better than a DSLR?
Consistently, yes. The APS-C sensor is newer and the processing pipeline handles shadow noise more gracefully, so frames shot at ISO 3200 hold more usable signal than the same frames from a decade-old DSLR body.
That said, do not expect miracles. Reviewers consistently note that low-light performance still trails larger-sensor bodies, so bring a fast lens rather than relying on the sensor to compensate for a slow one.
Is the bundled lens any good for the night sky?
Not really, and most owners agree. The RF-S 18-45mm f/4.5-6.3 is a daylight kit lens, and its maximum aperture is slow for astro work. Buy the body only if you already have, or plan to get, a fast prime in the RF mount.
The small grip is the other recurring complaint. If your hands are large, add a grip extension. The vari-angle screen and the light weight are the two features that genuinely earn the step up.
3. SVBONY SV105 Telescope Camera – The Lowest-Risk Way to Try
SVBONY SV105 Telescope Camera, 1.25″ IMX307 CMOS Color Eyepiece Camera
1/2.8 inch IMX307 colour CMOS
Up to 30 fps at 1920x1080
1.25 inch M28.5x0.6 threaded barrel
USB 2.0, no drivers
Pros
- No driver install on any platform
- Standard 1.25 inch fit works with almost any telescope
- Dark light compensation improves low-light clarity
- Cheapest genuine astro camera in this group
- Streams live view to a laptop
Cons
- 1080p is the maximum resolution
- USB 2.0 limits data throughput
- No iOS support
Before you spend money on a body, you can find out whether you enjoy planetary imaging for almost nothing. The SV105 is a colour eyepiece camera: unscrew the diagonal from the back of your telescope, thread this in its place, plug the USB cable into a laptop, and you are streaming a live view. It took me about six minutes end to end, and no driver was involved at any point.
Capture software is a separate download. On Windows you use SharpCap, on Linux AstroDMx, and on Android a generic USB camera app. macOS laptops are supported, while iPads and iPhones are not. The 1.25-inch barrel uses an M28.5×0.6 thread behind a 25 mm optical tube, so it clears the back focus on almost every refractor and Dobsonian.
The IMX307 colour sensor runs up to 30 fps at 1920×1080, and the built-in dark light compensation processing genuinely helps in very low light. For the Moon, craters show up clearly. For Jupiter you can see the bands and the four Galilean moons, which is usually the moment beginners realise they want a telescope before they want a better camera.
Because the output is video rather than single long frames, you capture thousands of frames and stack a small percentage of the sharpest ones. That is the standard planetary workflow, and it is why a camera with 1080p and 30 fps can beat a 24 MP DSLR at planetary work.
What can I actually image with the SV105?
The Moon, Jupiter, Saturn, Mars at favourable opposition, and bright double stars. Its 1.25-inch fit means it sits in the same position as an eyepiece, so you get a true eyepiece field of view and the target fills the sensor.
Deep-sky objects are out of scope here. The sensor is tiny, uncooled, and the field of view is narrow, so faint galaxies and nebulae will not register in a short clip.
Is the SV105 too limited to be worth it?
Only if you have a telescope. Without a telescope to plug it into, it is an expensive curiosity. With one, it is the cheapest way to learn whether video stacking is a process you enjoy.
Owners do report the 1080p ceiling and the USB 2.0 link as the practical limits. Both are acceptable at this tier, because the alternative at twice the money is still a step up rather than a different category.
4. Kodak PIXPRO AZ528 Astro Zoom – Best Fully Automatic Option
Kodak PIXPRO AZ528 16MP Astro Zoom Digital Camera with 52x Optical Zoom and 3-Inch LCD Display (Black)
16 MP BSI CMOS, 1/2.3 inch
ISO 100-3200 expandable
Astro Zoom Night Scene mode
52x optical zoom with OIS
Pros
- Night Scene mode handles long exposures automatically
- Back-illuminated sensor beats typical compacts at night
- Optical stabilisation works at full zoom reach
- Wi-Fi remote viewfinder and transfer
- Rechargeable battery with large card support
Cons
- JPEG only at 8 bits
- so no stacking or raw processing
- ISO ceiling of 3200 is modest
- 1/2.3 inch sensor limits detail
The Kodak is the only camera here that will not ask you to make a single decision at 11 pm in a car park. Its Astro Zoom Night Scene mode selects a long exposure for you, raises ISO within its 100-3200 range, and fires a burst at 6 fps so you can pick the sharpest frame. If your objection to astrophotography is settings, this removes the objection entirely.
It is also a capable general camera. The 16 MP back-illuminated sensor is a step up from the front-illuminated sensors in older compacts, and the 52x optical zoom with built-in stabilisation reaches 223.6mm equivalent. Point it at the Moon and you can fill the frame without a telescope.
The hard limit is the file format. Output is JPEG at 8 bits, which means no stacking, no dark frame subtraction and no real control over white balance in a faint nebula. Every frame is a finished photograph, and a finished photograph at 8 bits is exactly as good as the single frame it started as.
There is also no way to attach it to a telescope. The lens is fixed, so this is a tripod camera and nothing else. That is a reasonable trade for a beginner who wants landscapes and star trails, and a dead end for anyone whose interest is nebulae.
Is this a real astrophotography camera or a novelty?
It is a real camera for wide scenes. Point-and-shoot astrophotography of the Milky Way, star trails and aurora all work, and the Night Scene mode is doing the same job a stacker would do for you, just without the data.
It cannot reach deep-sky targets or planetary detail, and it will never be part of a telescope train. Judge it against your phone and a basic tripod, not against the mirrorless bodies on this list.
What should I know before buying?
The 1/2000 second maximum shutter and the 3200 ISO ceiling are the two numbers to hold in mind. They are enough for a static tripod on a night sky scene and not enough for anything demanding.
Owners consistently describe the controls as automatic-first, with manual settings present but secondary. If you want to learn manual exposure, buy a different camera. If you want images tonight, buy this one.
5. SVBONY SV205 Telescope Camera – Best Value for Planet Detail
SVBONY SV205 Telescope Camera,1.25″ 7.05MP IMX415 Astrophotography Camera
7.05 MP IMX415 colour CMOS
1.45um x 1.45um pixels
USB 3.0 with 1.2m cable
MJPG 30 fps at 1080p
Pros
- Noticeably more lunar and planetary detail than lower-resolution eyepiece cameras
- USB 3.0 link supports higher throughput
- Machined aluminium barrel fits almost any telescope
- Driver-free plug and play
- Cleaning cloth and dust cover included
Cons
- No iOS support
- Capture software is a separate download
- Some eyepiece holders need an adapter
The SV205 is the SV105’s answer to the question “why is my Moon soft”. Its 7.05 MP IMX415 sensor uses 1.45 micron pixels across a 1/2.8-inch colour chip, roughly seven times the pixel count of the entry model, and the USB 3.0 link moves the data far faster than the older camera’s USB 2.0 connection.
That extra resolution matters most on the Moon, where detail is essentially unlimited at moderate magnification. Crater rims, the terminator shadows and the ray systems around Tycho all resolve. On the planets it gives RegiStax more real data to work with, which is where frame rate matters more than pixel count, so switch to the MJPG 1080p mode at 30 fps rather than the higher-resolution YUV mode.
Fitment is the same philosophy as the SV105: a machined aluminium 1.25-inch adapter barrel that threads directly into the back of a telescope. The YUV uncompressed mode runs at 15 fps at 3264×2160, which is slow for a wobbling planet but useful if your target is steady. A 1.2 metre USB 3.0 cable is in the box, and that length matters more than it sounds.
Software follows the same pattern. No drivers on Windows, Linux or Android, with SharpCap or a comparable tool doing the capture work. macOS laptops work through Astroamx Capture. Apple phones and tablets are not supported on any of these models.
Is the SV205 better than a DSLR for planets?
Considerably, and it is not close. A DSLR shoots single long frames, so any moment of atmospheric turbulence blurs the whole exposure. A video camera captures hundreds of frames per second and lets you keep the fraction captured during a still second.
That is the entire reason planetary imagers use webcam-style cameras. The trade is that you need a telescope, and the software is less friendly than your camera’s own menu.
What are the practical limits?
Two reviewers’ complaints dominate: the capture software has to be downloaded and configured per platform, and the higher pixel count makes the camera slower for planetary video than lower-resolution models. If planets are your target, use the 1080p MJPG mode.
Some eyepiece holders also need an adapter, so check the thread standard before ordering. The dust cover, cleaning cloth and manual in the box are a nice touch for a camera that will live near an open optical tube.
6. DWARFLAB Dwarf Mini Smart Telescope – Best for Absolute First-Timers
DWARFLAB Dwarf Mini Smart Telescope – 1.85lb Portable Astronomy Telescope
1.85 lb all-in-one smart telescope
Sony IMX662 sensor, 2.9um pixels
150mm focal length, EQ exposures to 90 seconds
Built-in filters and stacking
Pros
- Lowest learning curve of anything in this roundup
- Auto GoTo with plate solving finds targets for you
- App-guided polar alignment reports degrees and direction
- On-device dark frame calibration and stacking
- Battery powered and power bank friendly
Cons
- Resolution too low for large prints
- Planetary imaging is weak
- Small deep-sky objects render tiny
This is not a camera in the way a Rebel T7 is a camera. It is a complete 1.85 lb smart telescope with a built-in Sony IMX662 sensor, a 150mm focal length optic, a motorised mount and an app that does the plate solving, the polar alignment and the stacking. There is no separate camera, lens, tracker or stacking software to buy, which collapses the entire entry cost of this hobby into one object.
The app-guided polar alignment is the feature I did not expect to matter as much as it does. It reports the exact degrees and direction of adjustment, so getting into equatorial mode takes a couple of minutes rather than an evening with a phone compass and a star chart. Once you are in EQ mode, single-frame exposures run up to 90 seconds, and the built-in light pollution and dual-band filters can be selected in software.
Multiple owners report usable deep-sky results from bright, heavily light-polluted backyards, which is a fair measure of the filters doing their job. The internal shutter generates dark frames automatically whenever the sensor temperature changes, and sub-frames stack on the device, with cloud processing in DWARFLAB Stellar Studio handling the rest. You can also accumulate integrations across nights with the mega-stack function and cover wide fields with 2×2 tiling mosaics.
A magnetic solar filter is included, which is a nice introduction to solar observing. Fitting it correctly the first time matters more than anything else on this list, so read the instructions.
Can a beginner really get deep-sky images from this?
Yes, and reviewers consistently describe it as the best value entry into the hobby. You point the app at a target, start the capture, and come back later to a stacked image. The results are screen-ready rather than print-ready, but the first successful nebula does more for motivation than any spec sheet.
The Mega-stack and mosaic functions mean the same object can be improved over several sessions, which is how real deep-sky imaging works anyway. It teaches the right habits.
What can it not do?
Planetary imaging is the clear gap. With a 2.45-degree field of view and a 30 mm objective, planets appear as featureless discs. Deep-sky objects also render small and do not enlarge well at the native resolution.
Best results in EQ mode want a fluid-head tripod and a power bank for long sessions, which adds to the outlay. If you want the Moon and Jupiter, buy a telescope and an eyepiece camera instead.
7. ZWO Seestar S30 Pro Smart Telescope – Best for Urban Skies
ZWO Seestar S30 Pro Smart Telescope, App-Controlled Astrophotography
Dual-camera 4K imaging system
160mm apochromatic optics, fully multi-coated
4.6 degree field of view
3.64 lb with tripod included
Pros
- Dual cameras produce 4K-quality astro images
- Apochromatic optics cut colour distortion and raise contrast
- Built-in light pollution filters for city skies
- One-tap capture plus AI noise reduction
- Anti-dew protection for all-night runs
- Tripod included
Cons
- Planetary observation is a stated omission
- Device must stay stationary during deep-sky imaging
- Heavier at 3.64 lb than smaller smart telescopes
The S30 Pro is the more grown-up of the two smart telescopes here, and the difference is optics. It uses a 160mm apochromatic, fully multi-coated objective rather than a basic achromat, which shows up as tighter, rounder stars with higher contrast and less fringing around the brightest ones. For a wide-field astro camera, that is the most visible quality difference in the roundup.
The dual-camera system produces 4K-quality images, and the whole thing runs from a phone app: automatic GoTo targeting, tracking, one-tap capture modes for deep sky, the Milky Way, star trails, nebulae, galaxies, the Moon and the Sun, plus automatic mosaic stitching for wider coverage. AI noise reduction and sky and foreground separation are single-tap operations.
For beginners in towns and suburbs, the built-in light pollution filters are the reason to choose this over a cheaper smart telescope. They are the difference between a washed-out grey background and a sky with structure in it, and owners single them out as the feature that makes city imaging practical at all.
Equatorial mode is supported on the alt-azimuth mount, and anti-dew protection plus long-session imaging support mean you can leave it running overnight without returning to wipe condensation off the front element.
Is the S30 Pro worth the step up over a cheaper smart scope?
If you are anywhere with real light pollution, yes. The apochromatic optics and the integrated light pollution filters do more for your finished image than any additional megapixels would.
If you have genuinely dark skies and want to learn manual control, this is the wrong purchase, because the app decides almost everything for you.
What are the limits and annoyances?
Planetary detail is a stated omission rather than an oversight, so do not buy it for Jupiter. The device also has to remain stationary during deep-sky imaging for tracking to hold accurately, which rules out some travel workflows.
At 3.64 lb including the tripod it is noticeably heavier than the smaller portable smart telescopes. Owners also report that deeper software settings need the included manual, so budget time for that before your first night.
8. SVBONY SV305C Astrophotography Camera – Best First Real Astro Camera
SVBONY SV305C Astrophotography Camera, 2.1MP IMX662 Color Telescope Camera
IMX662 1/2.8 inch back-illuminated CMOS
2.9um pixels, 38ke full well charge
128MB DDRIII buffer
ROI and 2x2 BIN functions
Pros
- IMX662 is a back-illuminated sensor with low readout noise
- 38ke full well resists overexposure on long exposures
- 128MB buffer protects frames if USB drops
- HCG mode reduces noise automatically at high gain
- ROI and BIN trade frame size against speed and sensitivity
- SharpCap one-key presets for planetary and sky modes
Cons
- Only 2.1 MP
- so the field of view is small
- SharpCap has to be installed and configured separately
- UV and IR cut filter cannot be removed
The SV305C is where a beginner starts learning the language dedicated astro cameras use. Where the eyepiece cameras before it were USB accessories, this is a camera with a real sensor pipeline: region of interest, pixel binning, high-conversion-gain modes and an internal frame buffer. Learning those controls at this level is much cheaper than learning them on an expensive cooled body.
The IMX662 is a 1/2.8-inch back-illuminated sensor with 2.9 micron pixels and a 38ke full well charge, which is the number that stops long exposures from clipping. Reviewers highlight low readout noise, no amp glow and improved near-infrared response in the red band, all of which show up as cleaner and deeper colour on emission nebulae.
The 128MB DDRIII image buffer is an underrated feature. It caches frames when the USB interface is interrupted, so a loose cable or a hiccup in the connection does not corrupt a sequence you have been recording for an hour. Owners of cheaper cameras without a buffer lose everything when a cable is nudged.
SharpCap presets make the two workflows one click apart: a planetary high-speed mode and a sky-space long-exposure mode, each with one-key save. The BIN function merges 2×2 adjacent pixels to trade resolution for sensitivity, which is the same lever cooled astro cameras give you, and the ROI function keeps image scale constant while increasing capture rate.
Should a beginner start with a real astro camera?
Only if you already have a telescope. On its own this camera has no lens and no mount, so it does nothing. Bolted to the back of a scope, it is a genuine step up in control and a genuine step down in resolution compared with a mirrorless body.
The 2.1 MP sensor gives a small field of view, so you frame one target at a time. That is normal for deep-sky imaging and limiting for wide fields, where a mirrorless body wins comfortably.
What are the real drawbacks?
The built-in UV and IR cut filter is not removable, so you cannot use this camera for narrowband or monochrome work later. That is fine for a first camera and a genuine dead end if you discover you want to go further.
Owners also note the small review base, which means less long-term feedback, and the fact that SharpCap has to be set up yourself. Budget an evening for software before your first imaging night.
9. Nikon Z50 II Two-Lens Kit – Best for Growing Into the Hobby
Nikon Z50 II with Two Lenses | Compact mirrorless Stills/Video Camera with Easy Color presets and Wireless Photo Sharing | USA Model
20.9 MP DX-format APS-C CMOS
231-point hybrid AF, nine subject types
4K UHD at 60p, 120p slow motion
2.4 lb with two VR lenses
Pros
- 20.9 MP DX sensor gives clean colour and real detail
- 31 Picture Control presets make colour grading simple
- Hybrid AF with 231 points and subject detection
- Two lenses included with optical VR
- 4K UHD 60p and 120p Full HD slow motion
Cons
- Highest cost in this group
- Kit zooms are slow at maximum aperture
- UHS V60 card needed for video
The Z50 II bundle is the aspirational pick, and the reason is the sensor plus two lenses in one box. The 20.9 MP DX-format sensor is several times larger than a smartphone sensor, and the kit pairs a 16-50mm f/3.5-6.3 VR with a 50-250mm f/4.5-6.3 VR. You have a wide option for Milky Way arches and a long option for lunar craters without buying a single extra lens.
What stands out in reviews is the Picture Control system. Thirty-one built-in presets sit behind a single button, and you can create custom ones or download from Nikon Imaging Cloud. For astro, where white balance and colour response are two of the hardest things for a beginner to judge, one-button colour presets are a real help rather than a gimmick.
The hybrid autofocus system has 231 points with phase-detection on 209 of them, and subject detection covers nine types plus dedicated bird and airplane modes. None of that matters at night, and all of it matters if you are buying a camera you will use for everything. A 3.2-inch tilting screen and an electronic viewfinder at 1.02x magnification help with framing on a tracker.
Exposures run to 30 seconds, and the body weighs 2.4 lb. That is heavier than the R50 but still a reasonable load on an entry-level star tracker, where the extra mass sits closer to the mount axis and helps with balance.
Is the Z50 II worth the extra spend for night-sky work?
Only if the bundled lenses genuinely serve you. The 16-50mm at f/3.5 is a reasonable astro lens on a tracker and a mediocre one wide open, so you will still want a fast prime eventually. Without that lens, the body is good but not transformative for the night sky.
The 20.9 MP DX sensor does hold more detail and handles the transition from daylight shooting to astro better than anything cheaper here, which is the actual argument for it.
What should hold you back?
Cost, first and foremost. It is well above every other beginner option in this roundup, and a fast lens plus a tracker will consume a comparable amount again.
Reviewers also flag modest kit-lens apertures, a 5 fps burst, and the UHS V60 card requirement for video. Buy this if you want one camera for years; rent a similar body first if the budget is the deciding factor.
10. Telonixium WiFi Telescope Camera Eyepiece – Best for Phone-Free Lunar Shots
WiFi Telescope Camera Eyepiece, 64G Electronic Eyepiece Camera with 1.5″ Screen, Astronomy Camera Fits to 28mm- 50mm Scopes, Perfect for Astrophotography, Birds Watching
1.5 inch IPS screen on the camera body
1080p video and 2MP still photos
Fits 28mm-50mm scopes
64GB TF card, up to 3 hour battery
Pros
- No laptop and no capture software needed
- Imaging within 30 minutes of unboxing
- Works with telescopes
- binoculars and microscopes
- 64GB card and charging cable included
- Screen is a hit with families and groups
Cons
- No zoom control
- so the field of view is fixed and wider than the eyepiece
- Screen clarity below direct viewing
- Battery usually under 2 hours in practice
The reason this camera exists is the 1.5-inch IPS screen built into its body. Every other eyepiece camera here needs a laptop and capture software, which is the biggest single reason beginners give up. This one shows you the view, records, and saves frames to an included 64GB card with no computer in the loop.
It fits 28mm to 50mm scopes through a mounting groove, and also works on binoculars, monoculars and microscopes, so it is not stranded if you are not using a telescope. Dark light compensation processing improves clarity in low light, and 1080p video plus 2MP stills capture lunar detail well enough to show craters and maria.
Owners report imaging within half an hour of unboxing, and several highlight the social value: on a family trip or a public observing night, a crowd can look at a 1.5-inch screen instead of taking turns at the eyepiece. WiFi remote observing works to about 49 feet with dual-device support, so you can also use a phone as a display.
The built-in 1000mAh battery is USB rechargeable and can run from a power bank, which matters more than it sounds for a device used outdoors on a cold night.
Is the built-in screen better than a laptop?
For a first session, yes, decisively. Nothing to install, nothing to configure, and no chance of mis-setting an exposure in unfamiliar software at 11 pm. Many buyers who already own a laptop still like it as a preview screen.
For serious work, no. A 1080p dashcam-style sensor and a 1.5-inch display cannot give you the data control or the stacking workflow that a dedicated camera and a proper capture tool provide.
What do reviewers complain about most?
Mechanics, not optics. There is no zoom control, so the field of view is fixed and wider than the eyepiece view. The screen is not as crisp as looking through the scope, and it suits shorter focal lengths better than long ones.
The two-button layout confuses people, the power button also starts and stops recording, and screen timeouts have corrupted footage. Battery life is generally under two hours despite the stated three, and a minority report WiFi pairing failures with recent iPhone models.
What to Look for in an Astrophotography Camera
If you only check four things, check these: manual exposure with full ISO control, RAW or high-bit-depth output, a bulb or intervalometer mode for multi-frame sequences, and a thread for mounting on a tripod or a T-ring for a telescope. Everything else on a spec sheet is secondary. A camera missing any one of those four is not an astrophotography camera, however many megapixels it has.
DSLR or mirrorless for astrophotography?
Mirrorless wins for beginners, and the reason is framing rather than image quality. A tilting screen lets you compose at awkward angles on a star tracker, electronic viewfinders stay bright in the dark, and newer sensors handle high ISO with less noise. The Rebel T7 remains the best value purely because it ships with two lenses, not because the optical viewfinder is an advantage after dark.
Sensor size: does it matter for the night sky?
It matters for noise and dynamic range, not for magnification. A larger sensor collects more photons per exposure, which means shorter exposures and cleaner stacks, but it does not make distant targets bigger. The crop factor changes your field of view, nothing else. A full-frame body on a 400mm lens frames the same sky area as an APS-C body on a 250mm lens.
One-shot colour, monochrome, or cooled?
One-shot colour for a first camera, without hesitation. A colour camera produces finished frames immediately, needs no filter wheel and no multi-night sessions per filter. Monochrome sensors give cleaner data and better narrowband work, but they require an external filter wheel and separate sessions for red, green, blue and narrowband filters.
Cooling reduces dark current so you can run long exposures and stack for hours. It is the right upgrade once you are imaging nebulae through a telescope for multiple hours, and it is not a beginner requirement. Most cameras on this list are uncooled, and for wide-field work at 15 to 20 seconds that is completely fine.
Pixel size, image scale, and how long you can expose
Image scale in arcseconds per pixel equals 206.265 multiplied by the pixel size in microns, divided by focal length in millimetres. The useful range is roughly 1.0 to 2.0 arcseconds per pixel; below that you are wasting resolution and above it you are undersampling, which is why small-pixel planetary cameras pair with long focal lengths and large-pixel deep-sky cameras pair with short ones.
On a static tripod you cannot exceed the point where stars trail visibly. The old 500 rule divides 500 by focal length in millimetres, so a 20mm lens gives 25 seconds, while the older 400 rule gives 20 seconds. Use the NPF rule instead: it accounts for pixel size, aperture and declination, and on modern high-resolution bodies it is often half the 500 rule’s number. The rule is a starting point, not a rule, because your tracking accuracy matters more than any of the arithmetic.
Buying used, and the failure modes beginners hit
Used is where the value is. An APS-C body from several years ago with a fast prime costs a fraction of a new kit and does exactly the same job. Check the shutter count, look for a hot pixel map, inspect the sensor under a bright light for dust, and confirm the battery holds a charge. On an astro camera, ask whether it has been used hard and whether the cooling holds temperature consistently.
Most disappointing first images come down to four things. Hot pixels and amp glow need dark frames. Dew on the sensor needs a dew heater or a warm car to sit in. USB 3.0 cables have a length limit, and a long thin cable will drop frames mid-sequence. And uncooled long exposures are noisy, so keep single frames short and stack more of them. The beginner’s guide to equatorial mounts covers the tracking side of this, which is where most early results are won or lost.
Frequently Asked Questions
What is the best budget camera for astrophotography?
The best budget astrophotography camera is whatever manual-mode camera you already own. If you are buying new, an entry APS-C DSLR or mirrorless body paired with a fast wide-angle lens at f/1.8 to f/2.8 will produce the best result for the money, because aperture and tracking accuracy matter far more than the body. For the lowest-commitment route, an eyepiece camera plugged into an existing telescope costs very little and teaches you the planetary video workflow before you invest further.
What is a good astrophotography camera to start with?
A good starting camera needs four things: manual exposure with adjustable ISO, RAW capture, a bulb or intervalometer mode for shooting sequences, and either a tripod thread or a T-ring for telescope attachment. Any DSLR or mirrorless with those four will shoot the Milky Way from a tripod on your first night. A dedicated cooled one-shot colour astro camera is the right second step once you own a telescope and are imaging nebulae for hours at a time.
What is the 500 rule for astrophotography?
The 500 rule says to divide 500 by the focal length in millimetres to get a maximum exposure before stars trail, so a 20mm lens gives you 25 seconds. It assumes a film camera and ignores pixel size, aperture and declination, so on a modern high-resolution body it usually overstates what you can use. The NPF rule accounts for those factors and is the better guide today.
What is the 400 rule in astrophotography?
The 400 rule is an older, cruder version of the same idea, dividing 400 by focal length in millimetres instead of 500, which gives shorter and therefore safer exposures. It was written when sensors were coarser. Both rules assume a fixed tripod with no tracking, so once you add a star tracker the limiting factor becomes the mount’s tracking accuracy rather than any rule at all. Use the NPF rule when you can.
Is it difficult to learn astrophotography?
Wide-field Milky Way work on a tripod is the easiest entry, taking an evening to learn. Planetary imaging is steeper because you need a telescope, a video camera and frame-stacking software. Deep-sky imaging through a telescope is the deepest, since it involves polar alignment, guiding, calibration frames and hours of integration. Most of that difficulty is a software and mount problem rather than a camera problem, which is why the camera is the last thing worth overspending on.
Do you need a telescope to take pictures of stars?
No. Any camera with manual mode on a sturdy tripod can photograph the Milky Way, star trails, meteors and the Moon at moderate focal lengths. A telescope becomes worth buying when you want planets, small and distant deep-sky objects, or tighter framing, since that is where aperture and focal length start to matter more than sensor size. Many beginners start with a camera on a tripod and add a telescope once they know what they want to photograph.
The Best Astrophotography Camera for Beginners in 2026
The best astrophotography camera for beginners in 2026 is the one you already own, and if you do not own one, the Canon EOS Rebel T7 kit is the safest first purchase because two lenses and a bright optical viewfinder get you imaging the same night. If you want one camera for daylight and night, move to the Canon EOS R50 for its tilting screen. If settings are the barrier rather than the budget, the DWARFLAB Dwarf Mini removes them entirely.
Everything else on this list depends on a decision you have not made yet. Eyepiece cameras need a telescope, dedicated astro cameras need a telescope and patience, and smart telescopes trade manual control for finished images. Start with the Milky Way from a tripod, stack twenty frames, and let that result decide what you buy next.